
Introduction - WordPress to Webflow
If you're running a website for your Fintech business, you know that great performance and design are crucial for user engagement, conversion rates and in the end, your brand. We had the opportunity to work with clients who wanted to revamp their website of a platform like WordPress to Webflow.
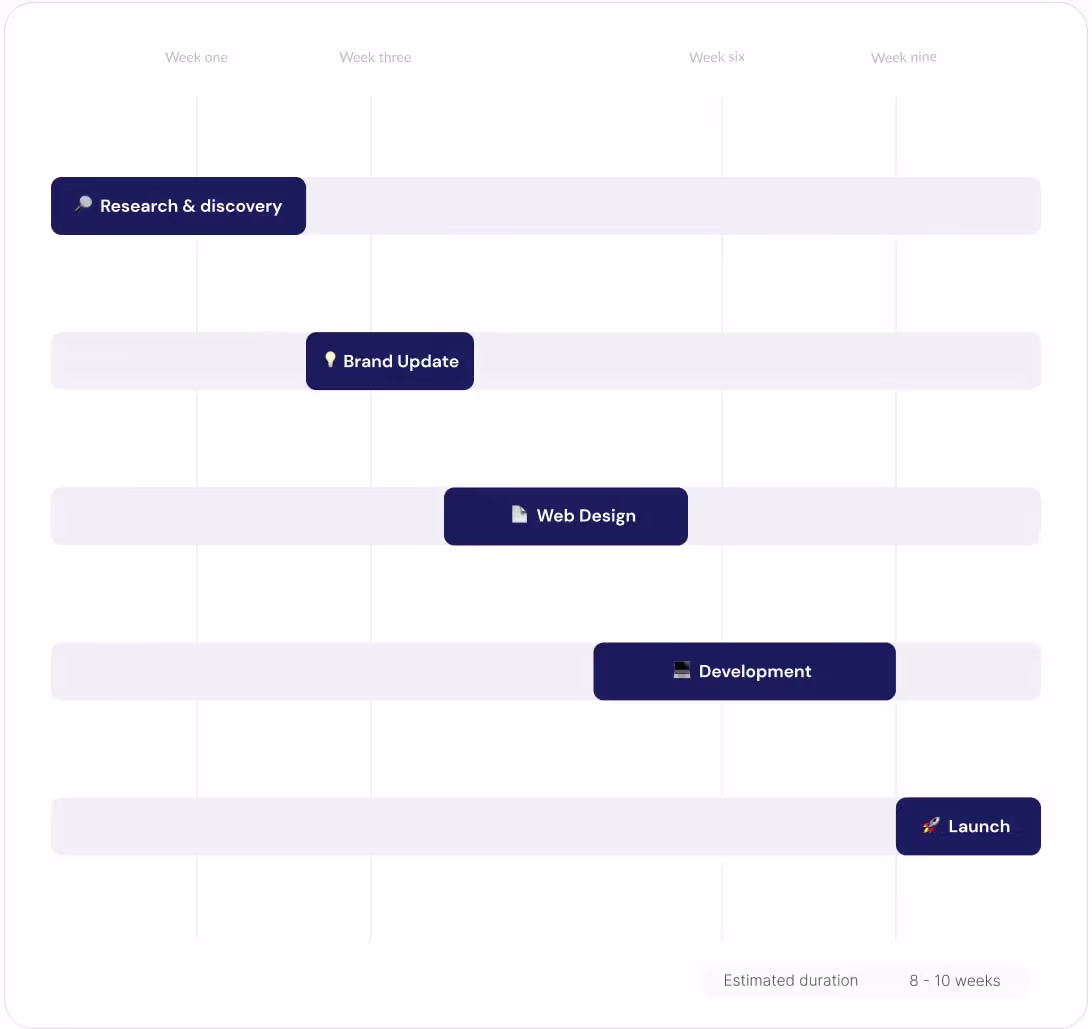
In this Step by Step Guide, we'll take a look at:
1: Research & Discovery
2: Brand Identity Update (if required)
3: Web Design - UI/UX
4: Migrating the website - All steps
5: Improving performance and development
6: CMS Training for the client
7: Launch
Step 1: Research & Discovery
Maybe your website is not performing as well as you'd like, or the design is starting to feel a bit outdated? It's time to take a step back and do some research and discovery.
Needs & Goals
Think about your needs and goals. What do you want it to accomplish? Is it generating leads? Showcasing your benefits? Providing information to your customers? Once you have a clear understanding of your website's purpose, you can start evaluating different visual styles.
Competitive landscape
At the same time, it's also important to take a look at your competitors and see what they're doing well VS where they may be falling short. This can give you ideas for ways to make you & your website stand out. Personas can be a helpful tool in understanding your target audience and their needs.

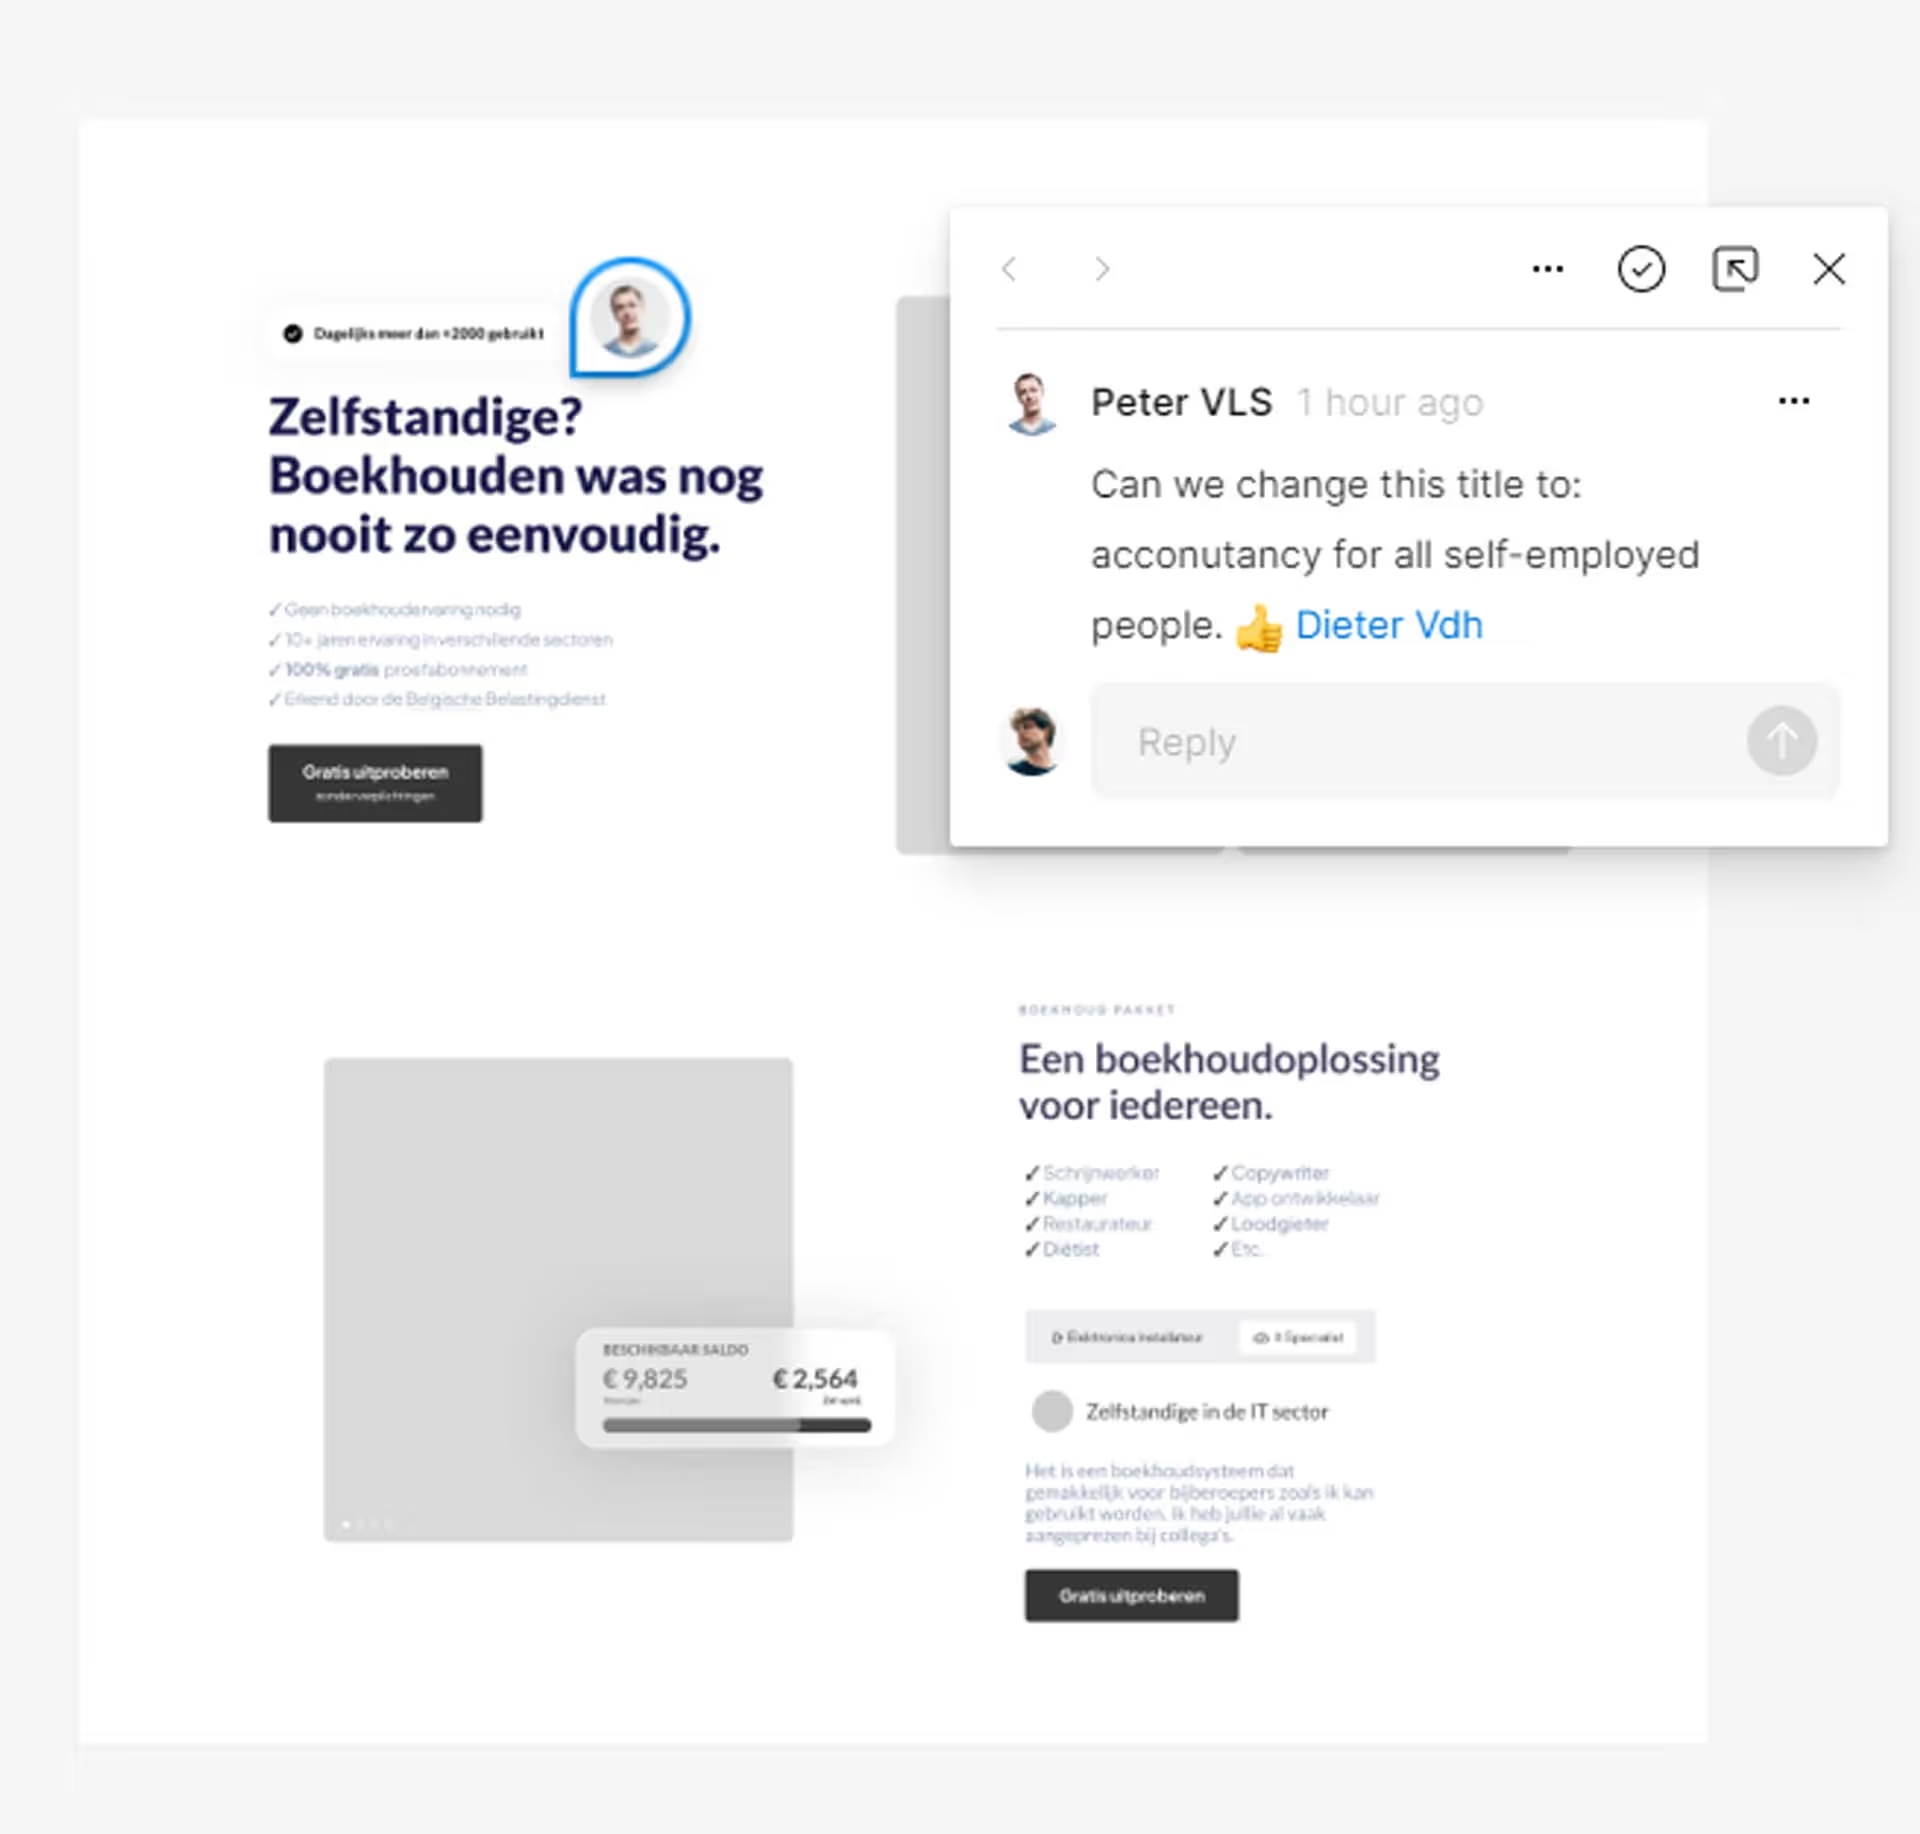
Step 2: Brand Identity Update (if required)
Your website is often the first or second impression potential customers will have of your business. It's important that it reflects your brand's identity and values. Updating your brand identity includes: updating your logo, color palette, typography, and overall visual design.
Keep in mind
A brand identity update may require changes to the structure and layout of your website. This will ensure that the new design elements are incorporated seamlessly and that your website's user experience is not affected.
It's important to ensure that these elements align with your brand's messaging & values.
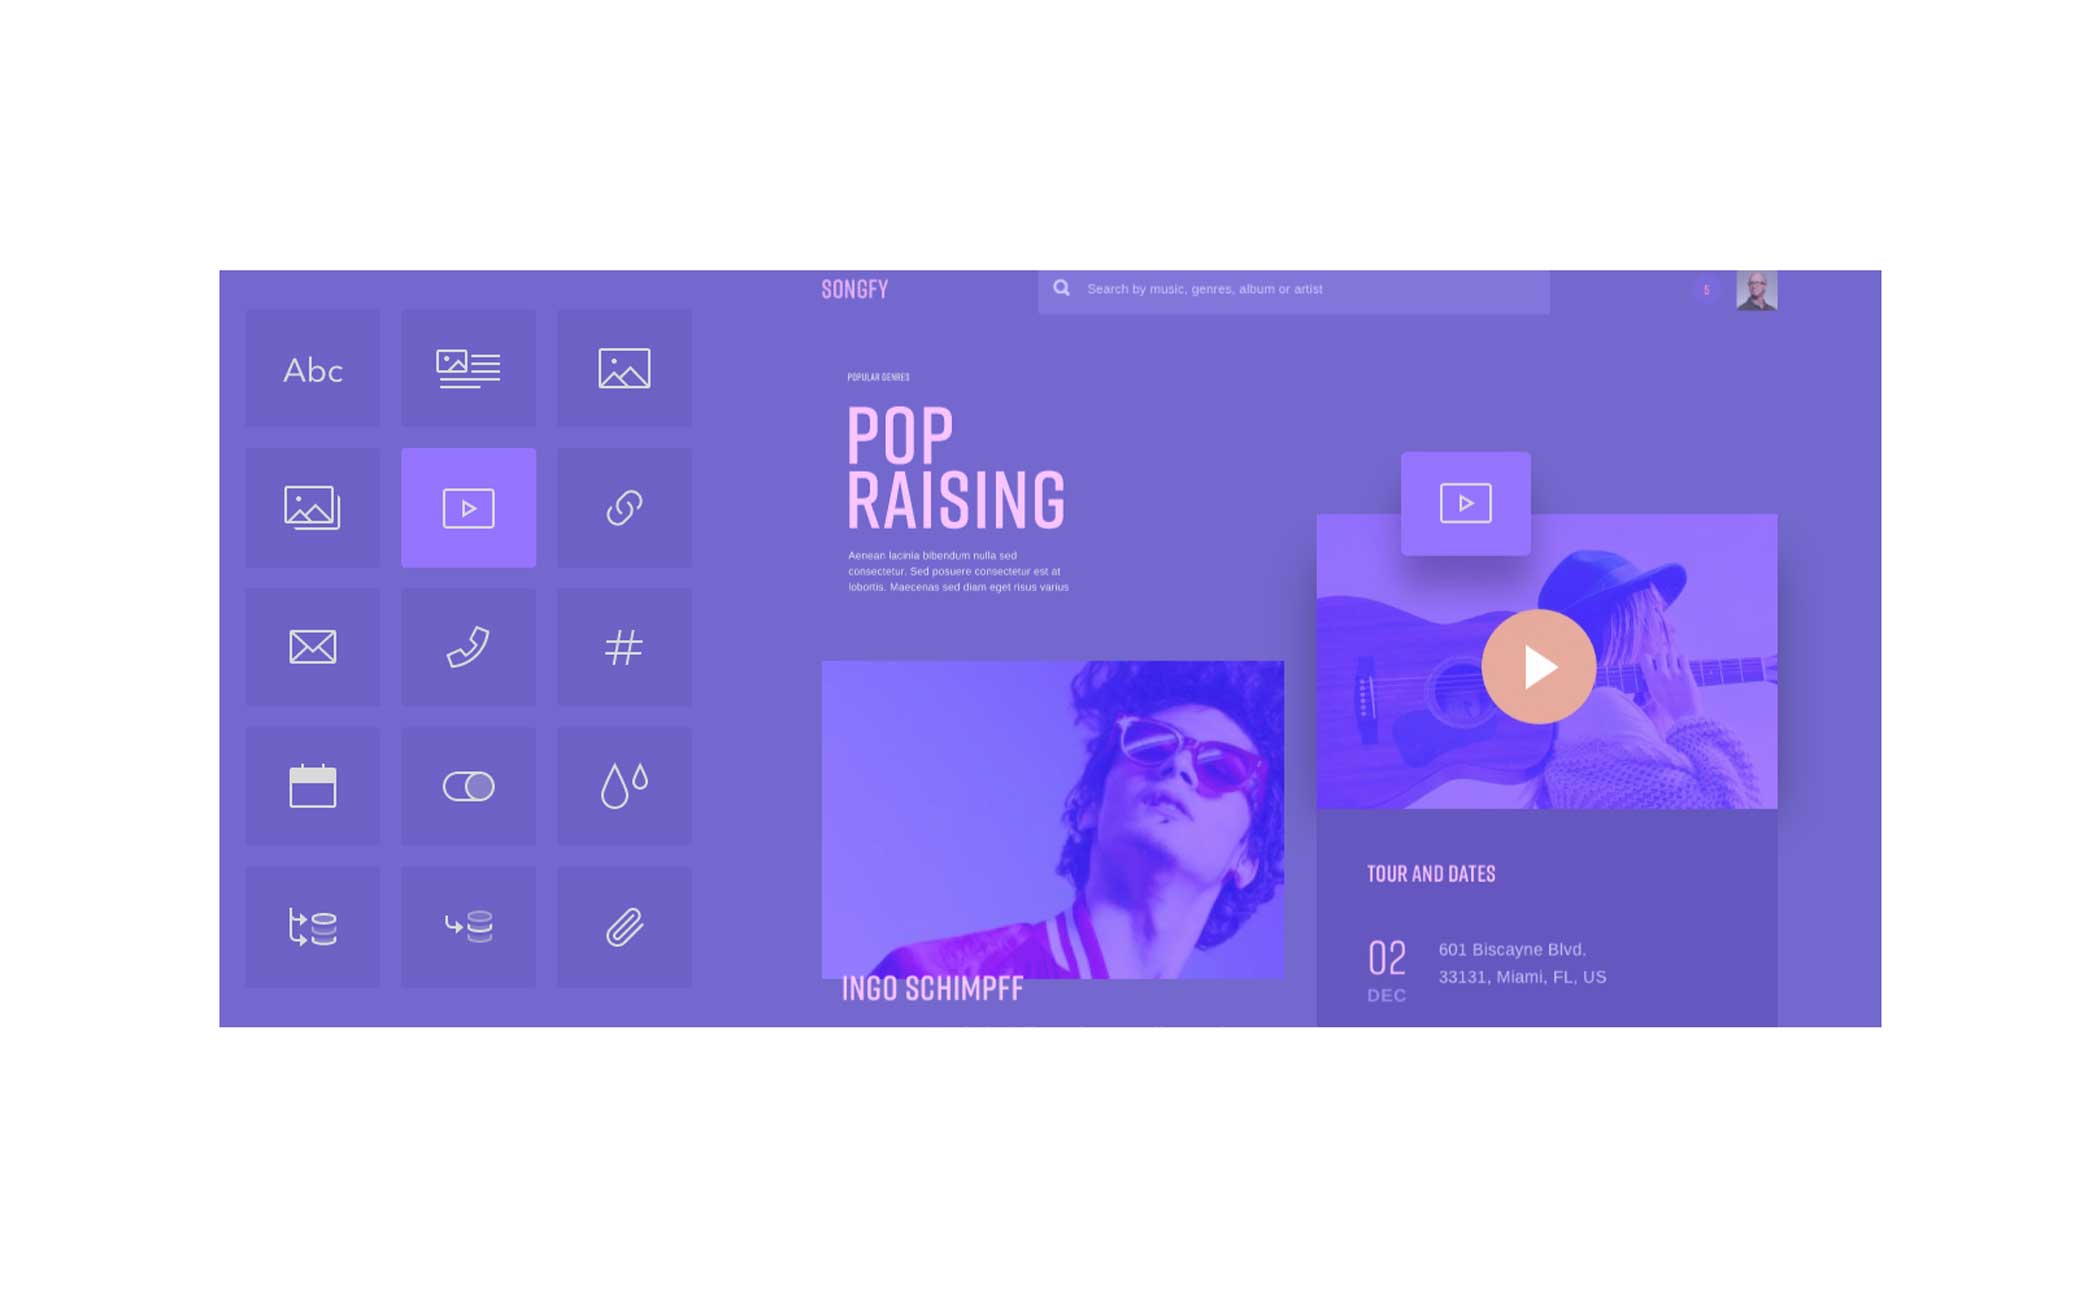
Step 3: Web Design - UI/UX
Web design is an exciting and dynamic field that combines creativity, technical skills, and user-centered design principles to create engaging online experiences. One of the most important aspects of web design is understanding the user interface (UI) and user experience (UX) – how users interact with a website and how it makes them feel.
The process of web design typically includes several phases, each with its own set of tasks and deliverables. These phases include:
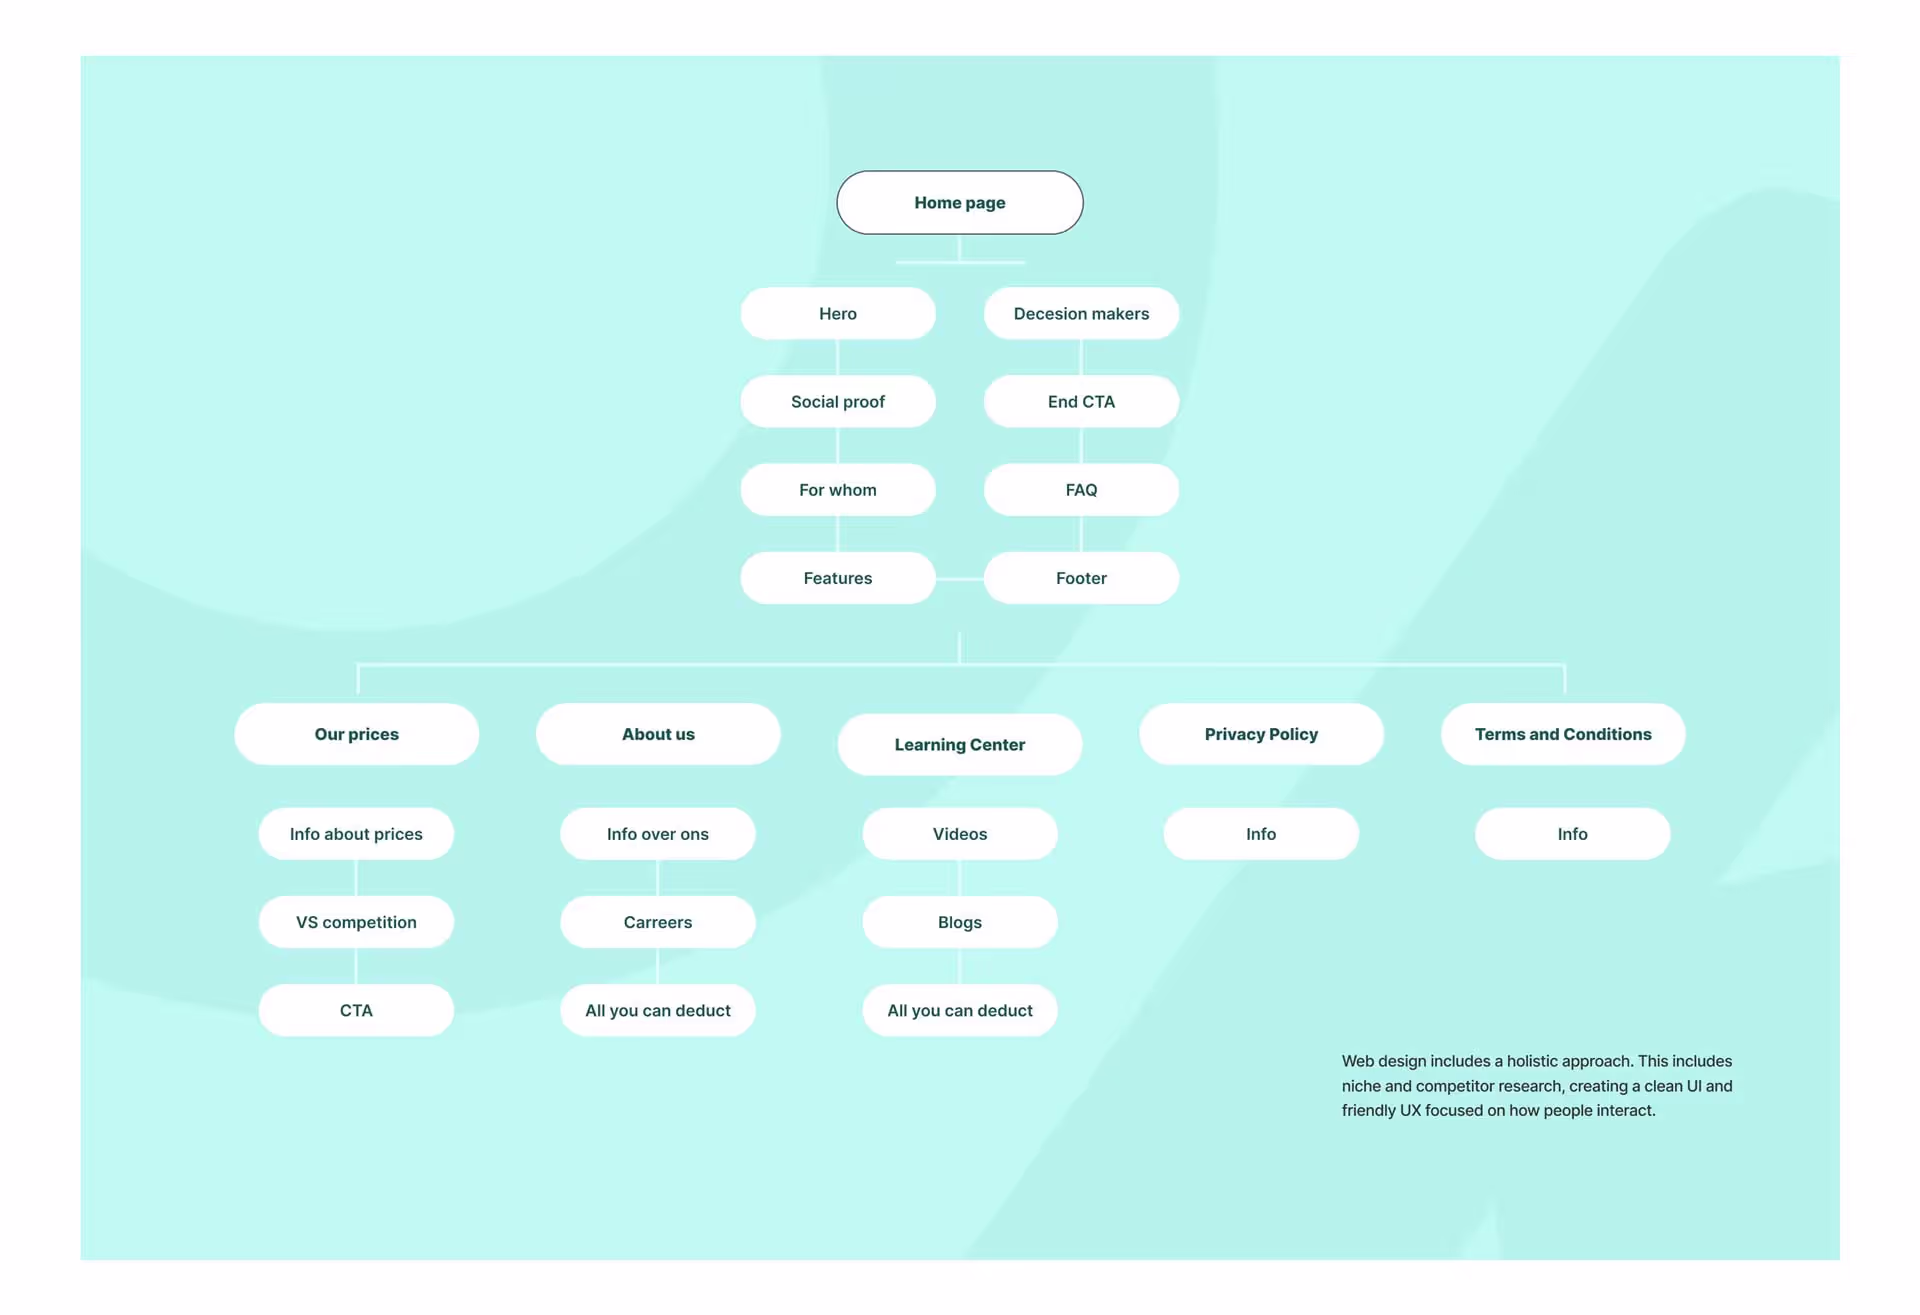
- Sitemap: In this phase, we create a visual representation of the website's structure, outlining the different pages and sections that will make up the site. This step is crucial for organizing the content and making sure that all important information is easily accessible.
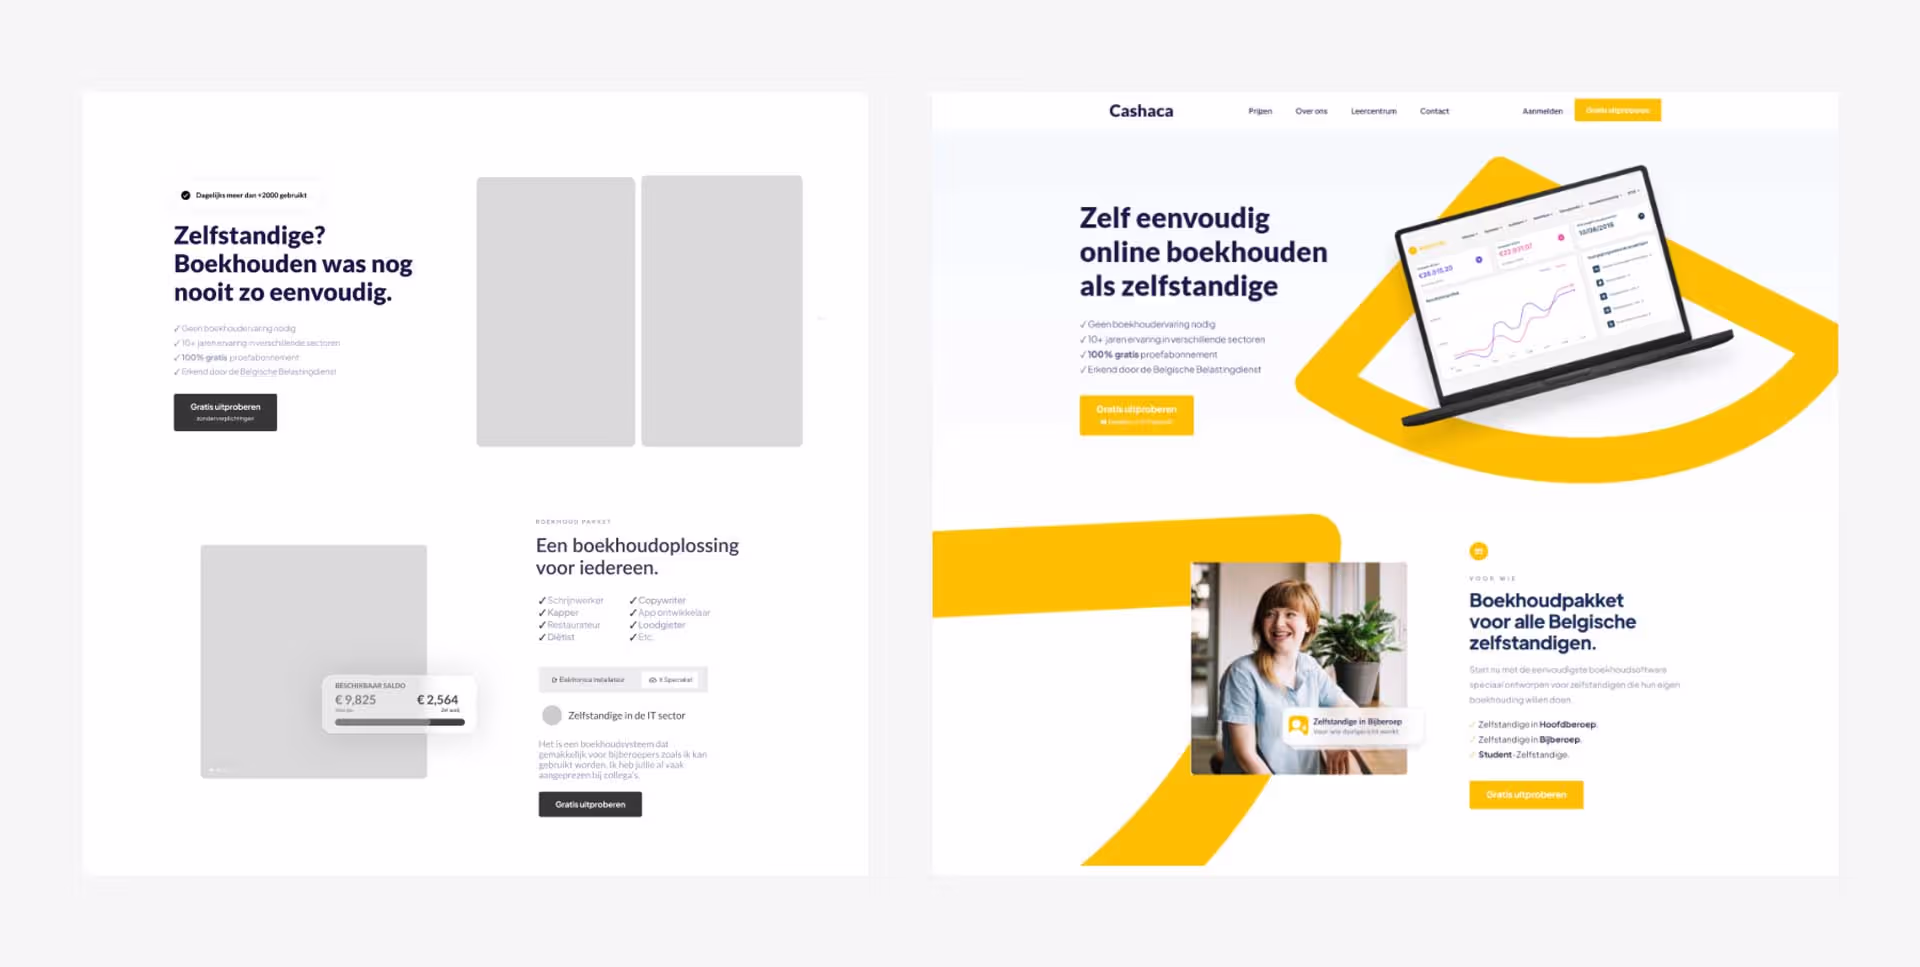
- Wireframes: Once the sitemap is complete, we move on to creating wireframes, which are basic, low-fidelity sketches of the website's layout and functionality. These wireframes are used to communicate design ideas and get feedback from stakeholders before moving on to the next phase.
- Copy: In this phase, we focus on the website's written content, including headlines, body copy, and calls to action. The goal is to create compelling and user-friendly copy that effectively communicates the website's message and drives conversions.
- Testing & revisions: After the design and copy are complete, it's time to test the website and make any necessary revisions. This includes usability testing to ensure that the website is easy to navigate and that all functionality is working correctly, as well as aesthetic revisions to ensure that the website looks and feels great.
Web Design is not only about the technical aspects, but also about understanding the user needs, creating a visually pleasing design and providing a seamless user experience. It's a fun and rewarding process that results in a website that not only looks great but also helps to achieve the client's goals.
Step 4: Migrating content from WordPress to Webflow
Moving to a new website building platform can be a daunting task, but it doesn't have to be. At VisualVisions, we've helped many clients make the transition from WordPress to Webflow, and we've learned a thing or two along the way.
Content Management Systems (CMS)
Migrating your database from WordPress to Webflow is like moving to a new house. The first step is packing up all of your things and getting them ready for the move.
Different options
When it comes to exporting your content, you have two options:
Option 1: You can use the built-in export feature on WordPress, kind of like packing up boxes and labeling them yourself. However, just like how some boxes may not be labeled correctly, by default this option will export your data in .xml format, which is not the best for moving to Webflow (CSV).
Option 2: You can use external CSV data export plugins (Export all WordPress data to XML/CSV). This option exports your website data as a CSV file, making it easier to move into Webflow.
TIP: take some time to plan out the structure of your new website before migrating your content. This is usually carried out in the Web Design phase.
CMS Steps:
1. Install the plugin
2. Define which content is to be exported
3. Move it into your new Webflow home
4. Identifying the fields
Installing the plugin
First things first, let's get the tools we need for the job.
To download the plugin, head on over to the plugins tab on your WordPress admin dashboard. Once there, click the "Add new" button and search for "Export any WordPress data to XML/CSV".

Once you've found it, click the "install" button and wait for it to finish up. After it's done, click on the "activate" button to start using it.
Define which content is to be exported
Okay, so now that you've activated your export plugin, it's time to pick and choose what content you want to take with you to Webflow. Think of it like packing your bags for a vacation, you want to bring the essentials and leave behind what you don't need.
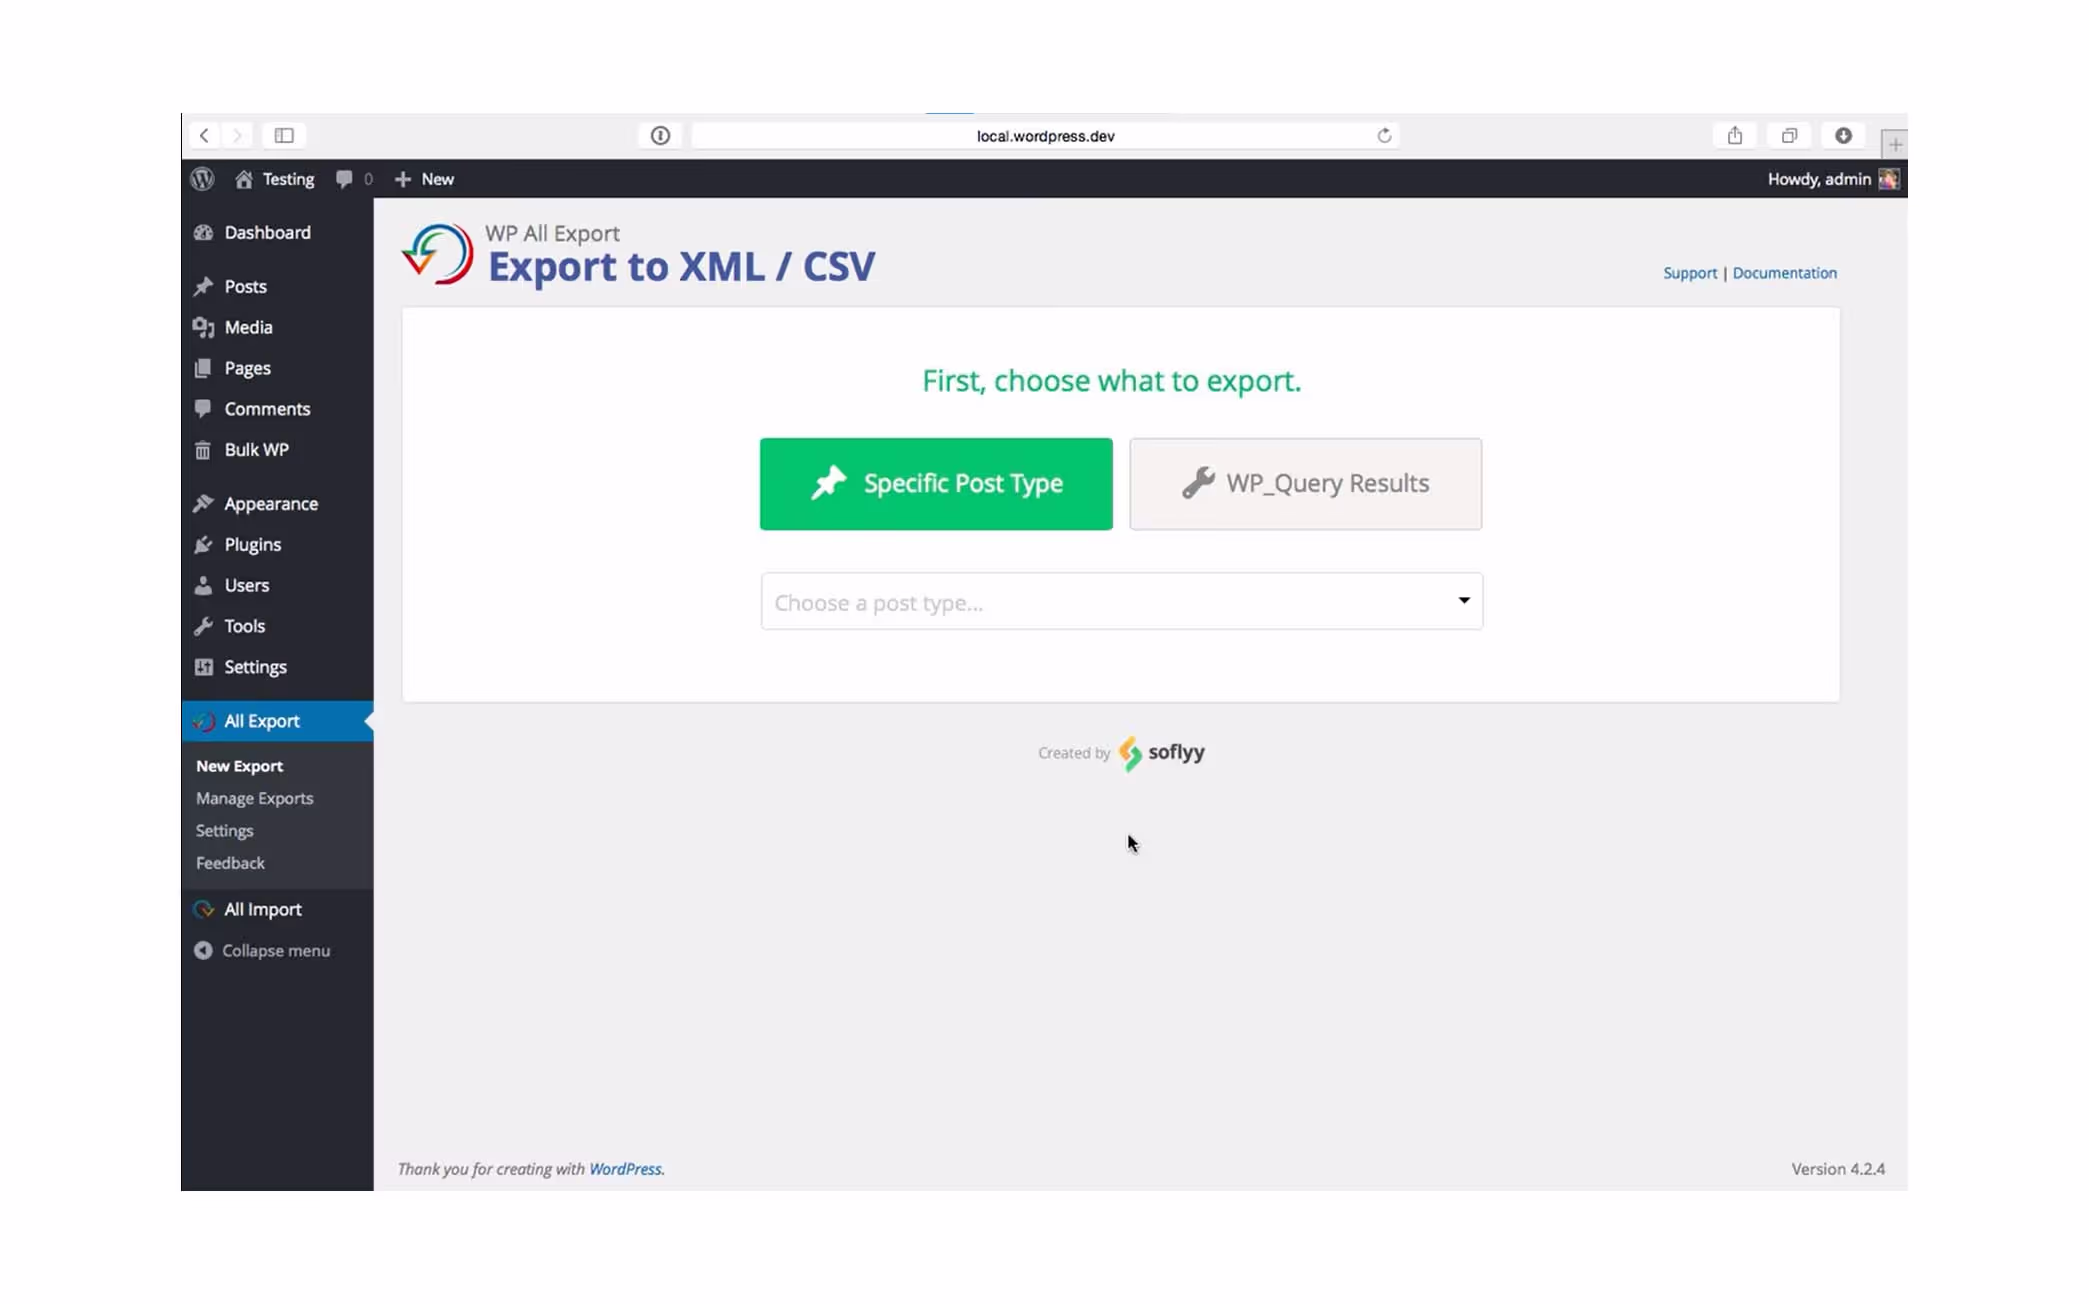
To do this, head to the "All export" settings on the left panel and select the content you want to export. Click the "Migrate posts" button, and then "Confirm & Run Export" to start the process.
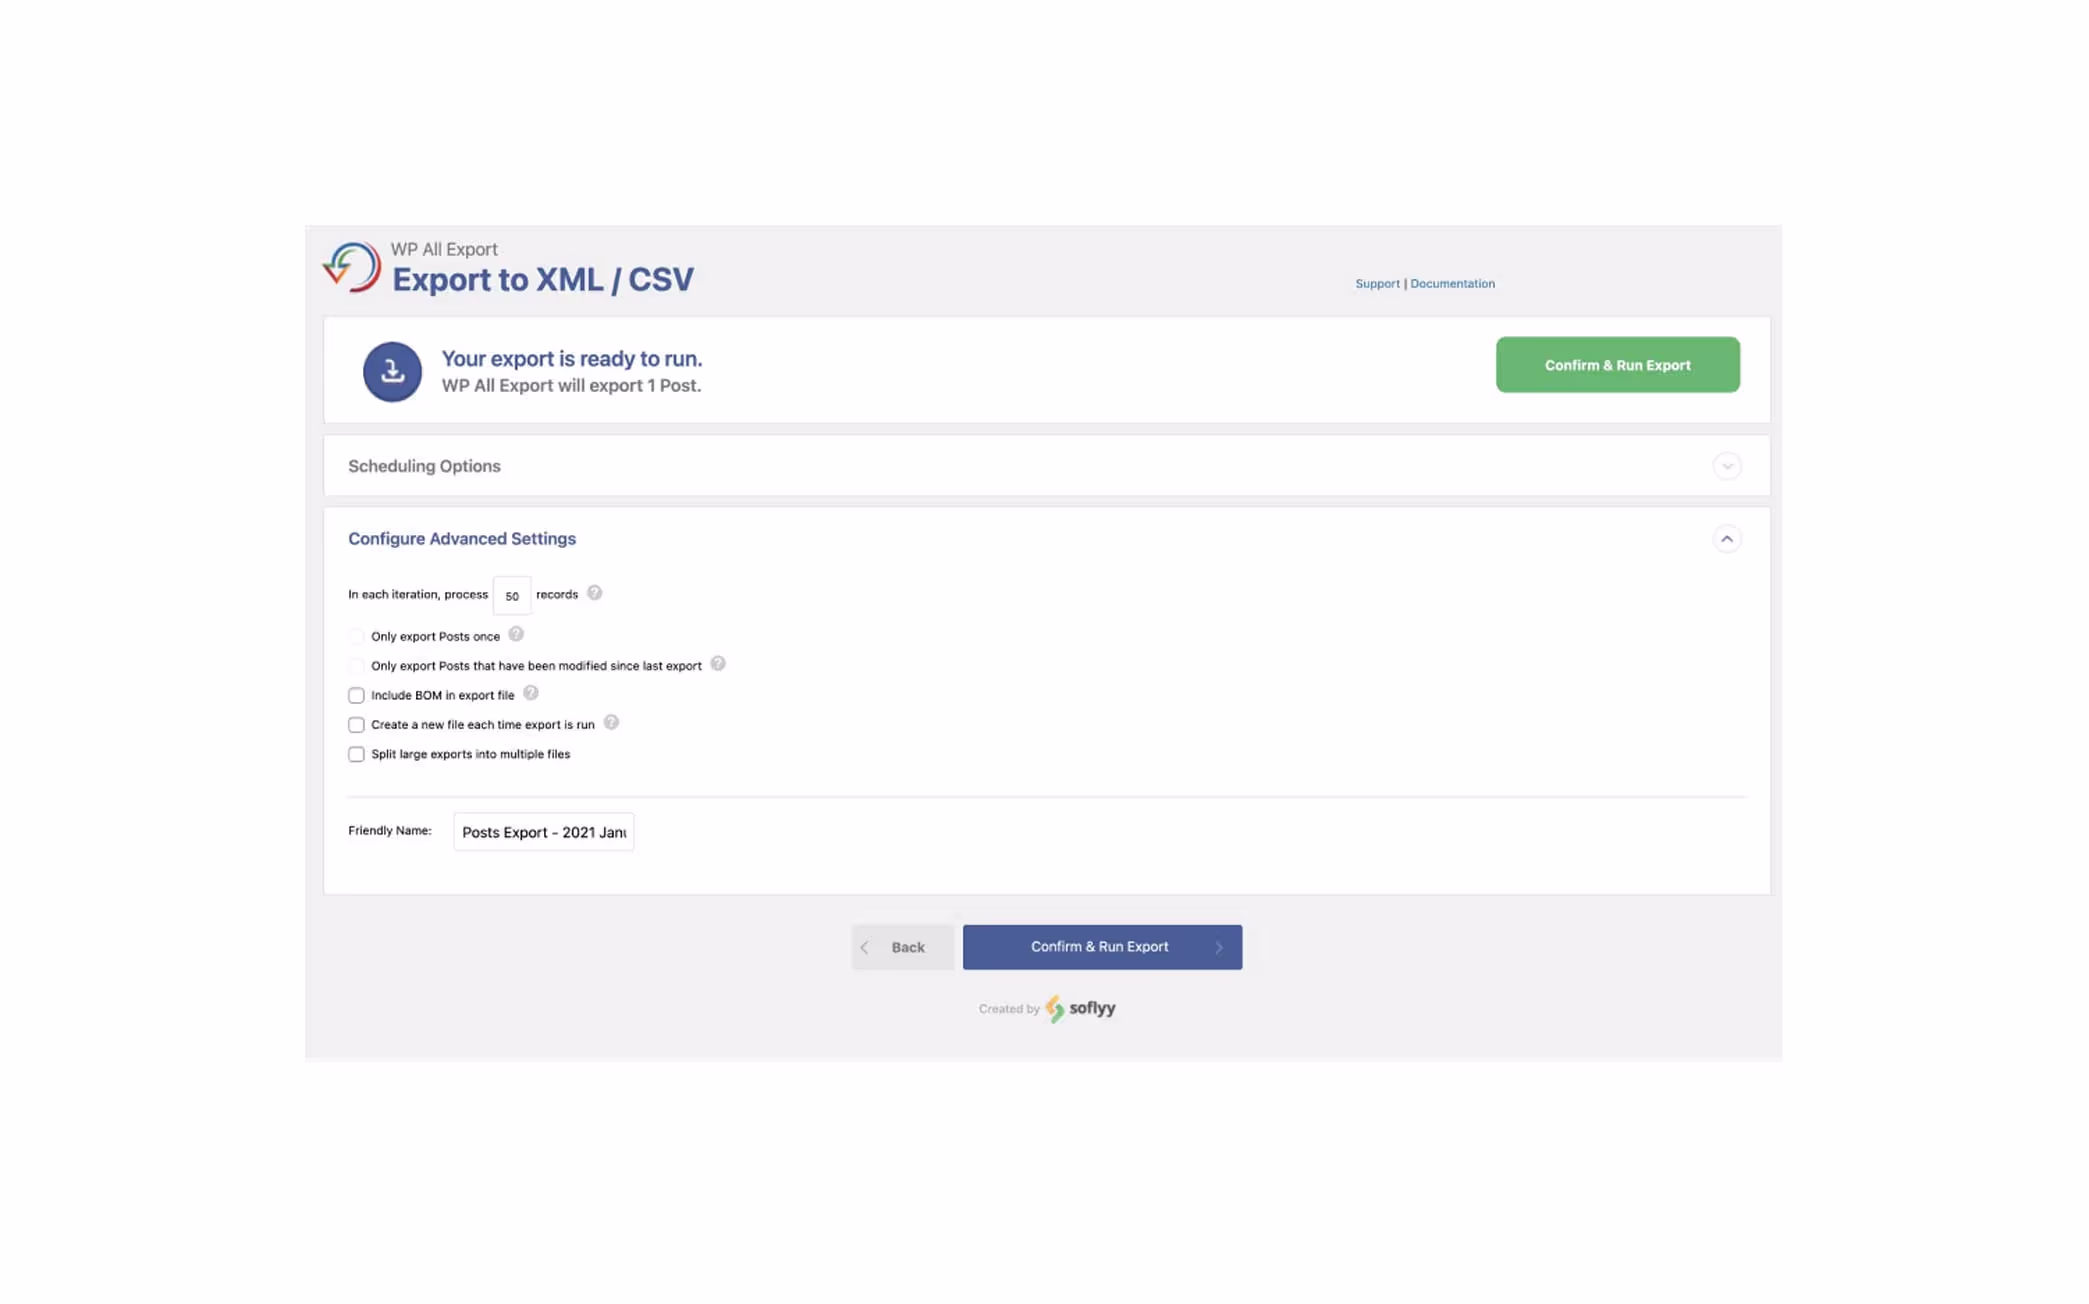
After a bit of magic behind the scenes, your CSV file will be ready to download.
TIP: Make sure to backup your website's content and settings before making any changes. This will ensure that you have a fallback option in case anything goes wrong during the migration process.
With some CMS cases, there is naturally more to this, as certain elements are different.
If necessary, you can edit the files manually in Google sheets.
Move it into your new Webflow home
Now that you've packed up all your content, it's time to move it into your new Webflow home. Here's how you do it: First, open up the collections panel on Webflow. Decide if you want to add your new content to an existing collection, or create a brand new one.

Click the import button on your collection settings, kind of like unpacking your boxes and putting your things where they belong.
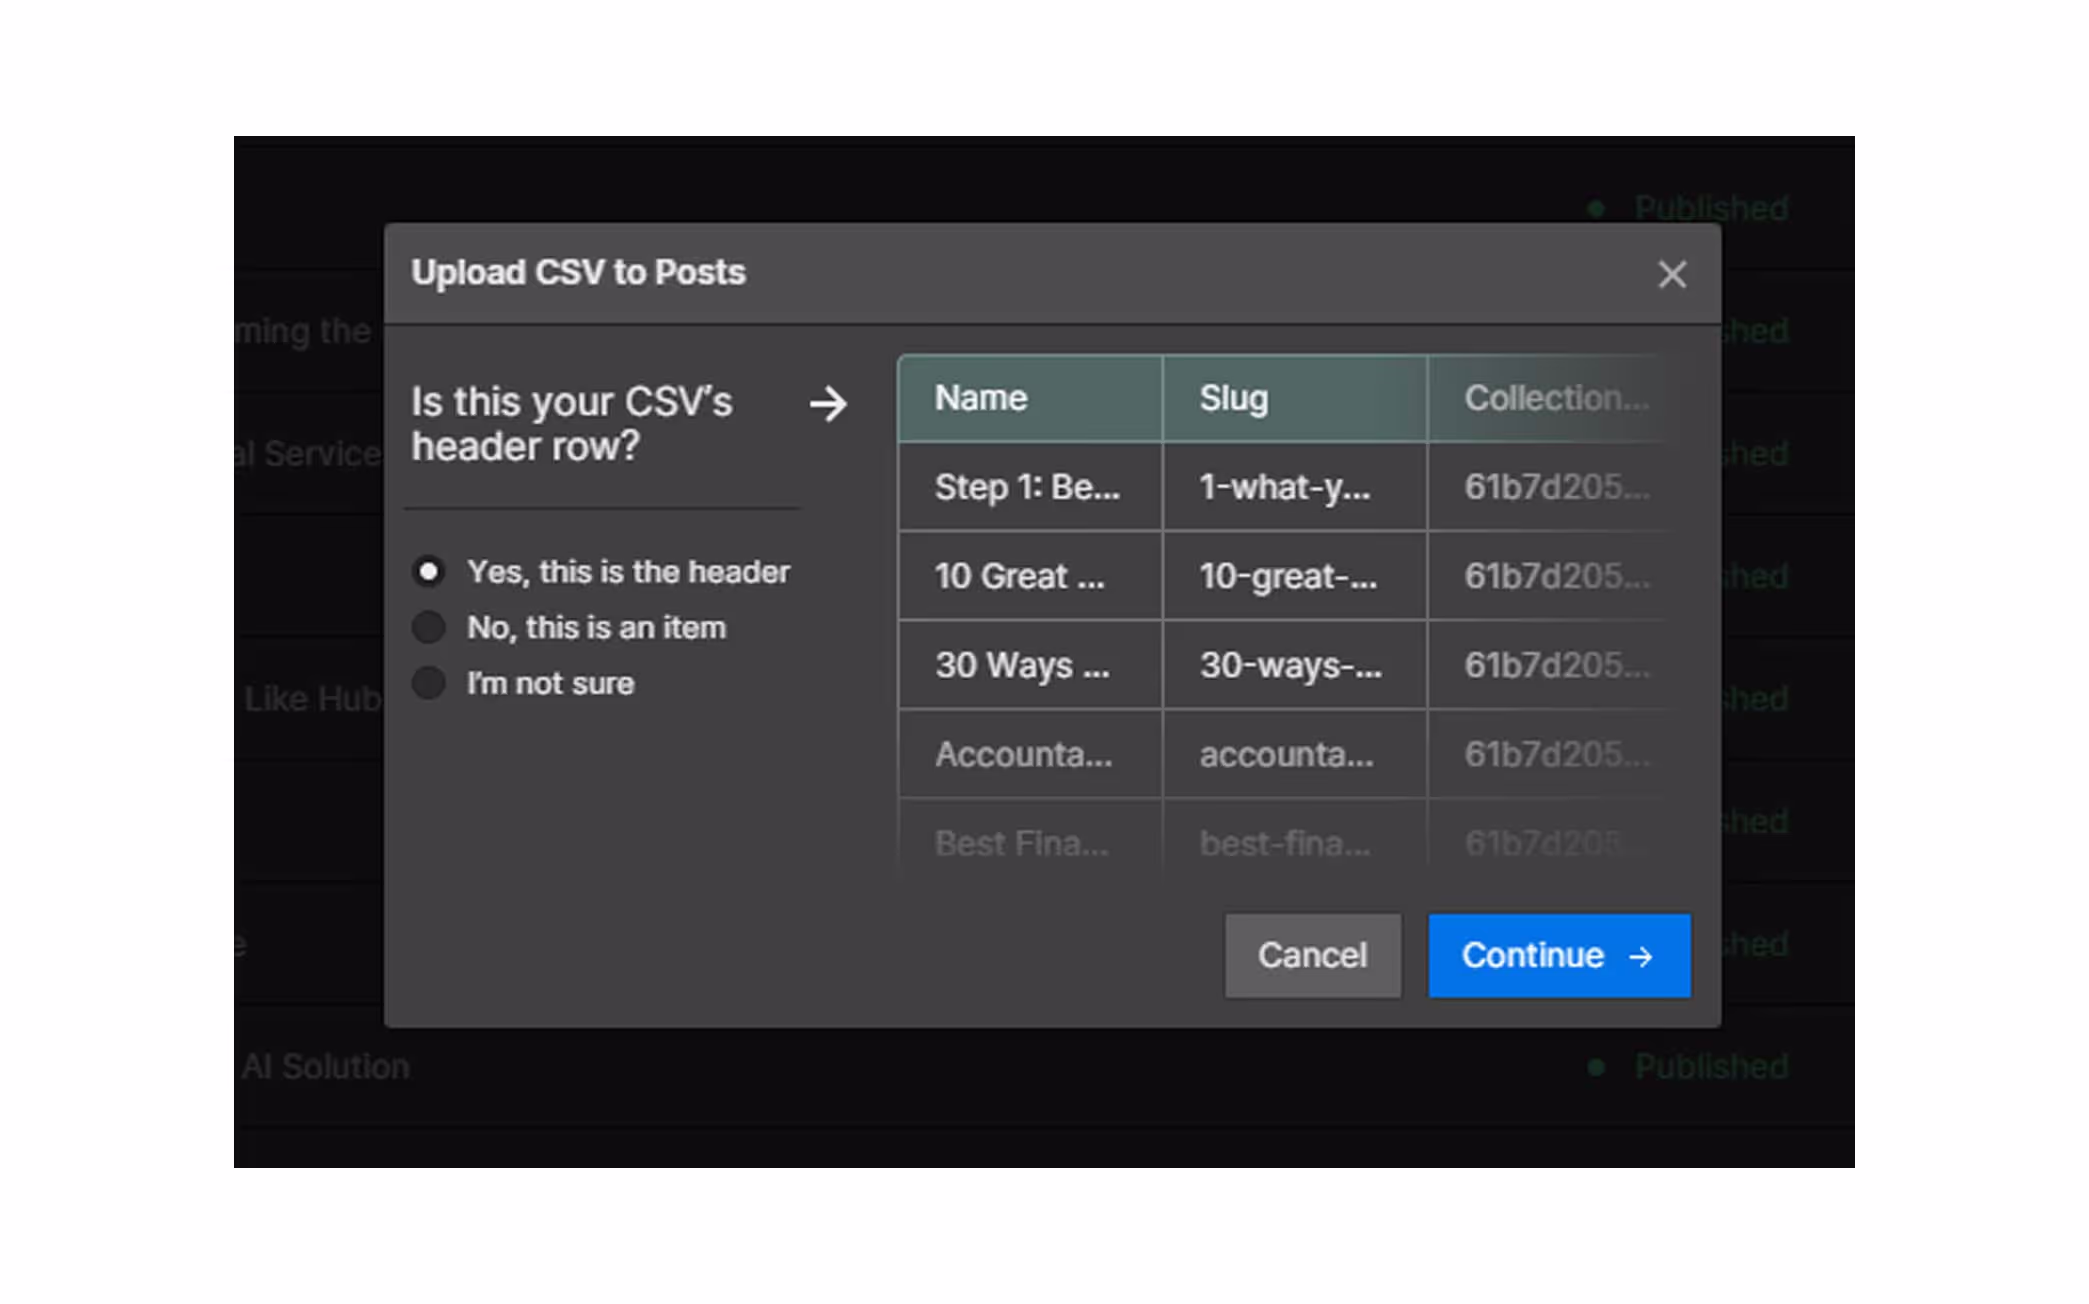
Once you've selected your file, a window will pop up asking you to select a header row. And don't worry, if you make a mistake or change your mind, you can always go back and adjust it later by checking or unchecking the “Header Row'' button.
Just a heads-up, Webflow has a free starter site plan that allows you to import up to 50 collection items. If you want to add more, you'll need to upgrade to the CMS or Business site plan which allows for more items (up to 2,000 for CMS and 10,000 for Business).
Also, note that the maximum file size for a CSV file is 4 MB.
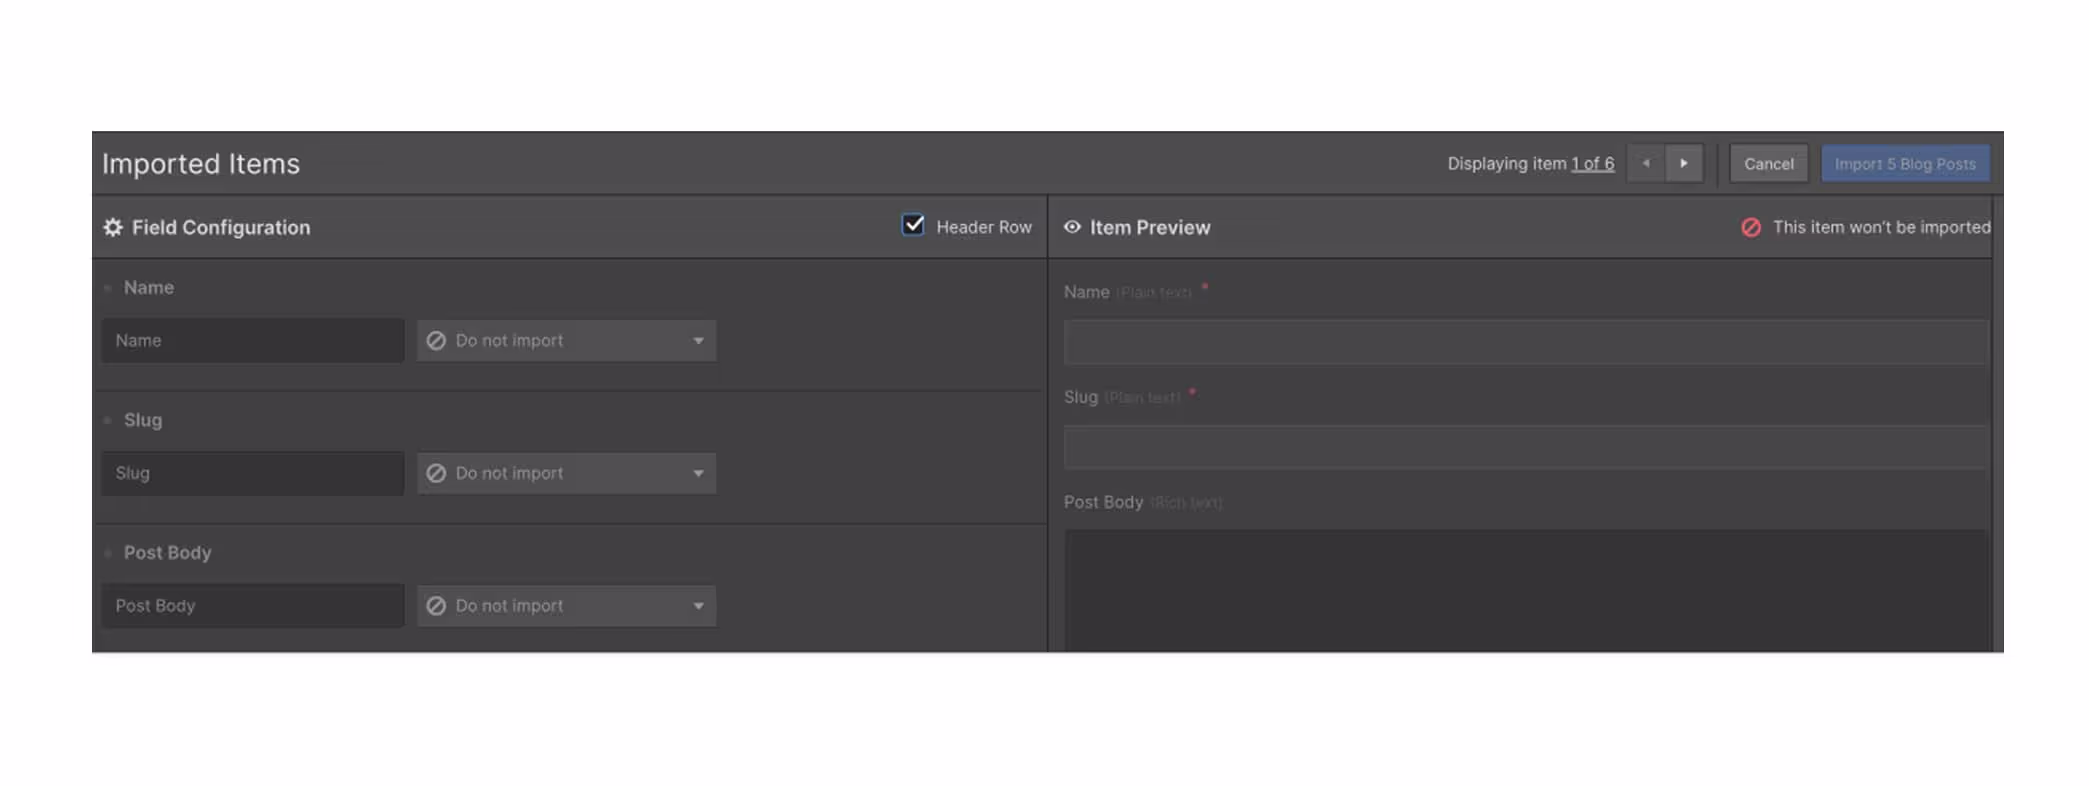
Identifying the fields
The final step in moving your content to Webflow is like putting the finishing touches on your new home. You need to match up the fields in your CSV file to the fields in your Webflow collection. It's like making sure that the picture you took in your old home fits perfectly in the new one.
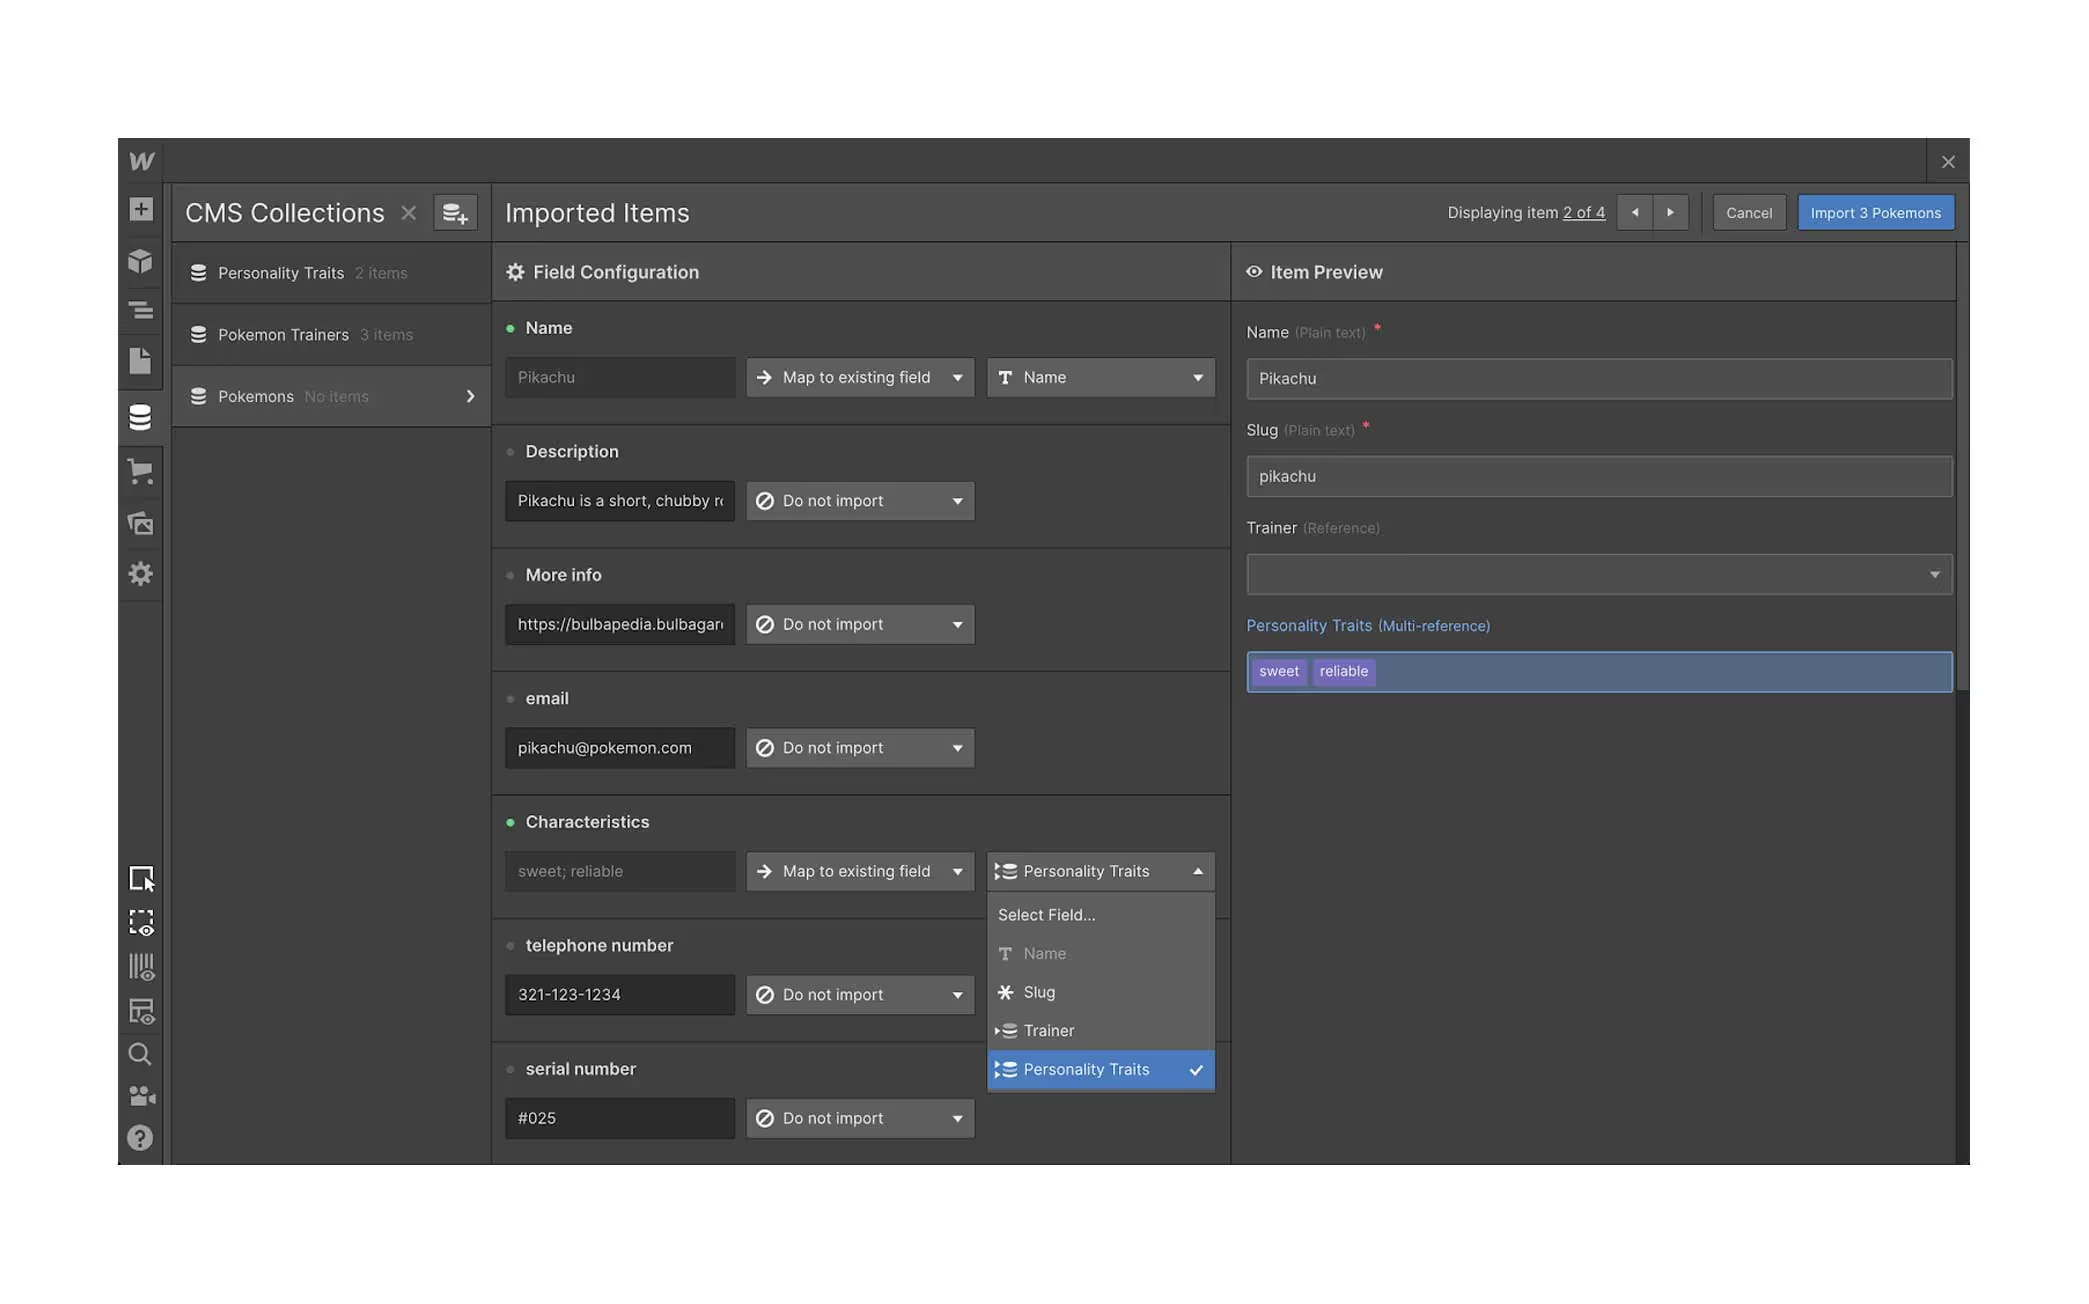
To do this, you can map your content to an existing field in your collection, create a new one, or even ignore a row completely if it's not needed.

Once you've made all the necessary matches, simply select the import button and voila! Your content will now be uploaded to your Collections panel.
IMPORTANT! Pay attention to images.
If your images are mapped to the Webflow CMS images field, such as a hero image, the upload will happen automatically.
However, if the import is mapped to a CMS rich text field, like a blog post, the images will be imported from their source URLs. Which means, if the original site gets taken down, the images will disappear too.
To avoid this, you would download each of the images from the rich text fields and upload them to the CMS manually. This way, even if the original site goes down, your images will still be safe and sound.
SEO Considerations - Webflow to WordPress
SEO can also be a concern when migrating to a new website building platform. But don't worry, Webflow has a variety of SEO options and features built in to help ensure that your website's search engine rankings don't take a hit. Make sure to take the time to set up your website's SEO settings and redirects to ensure a smooth transition.
SEO Steps:
1. Titles and descriptions
2. Open Graph settings
3. 301 / URL redirects
4. Robots.txt and sitemaps
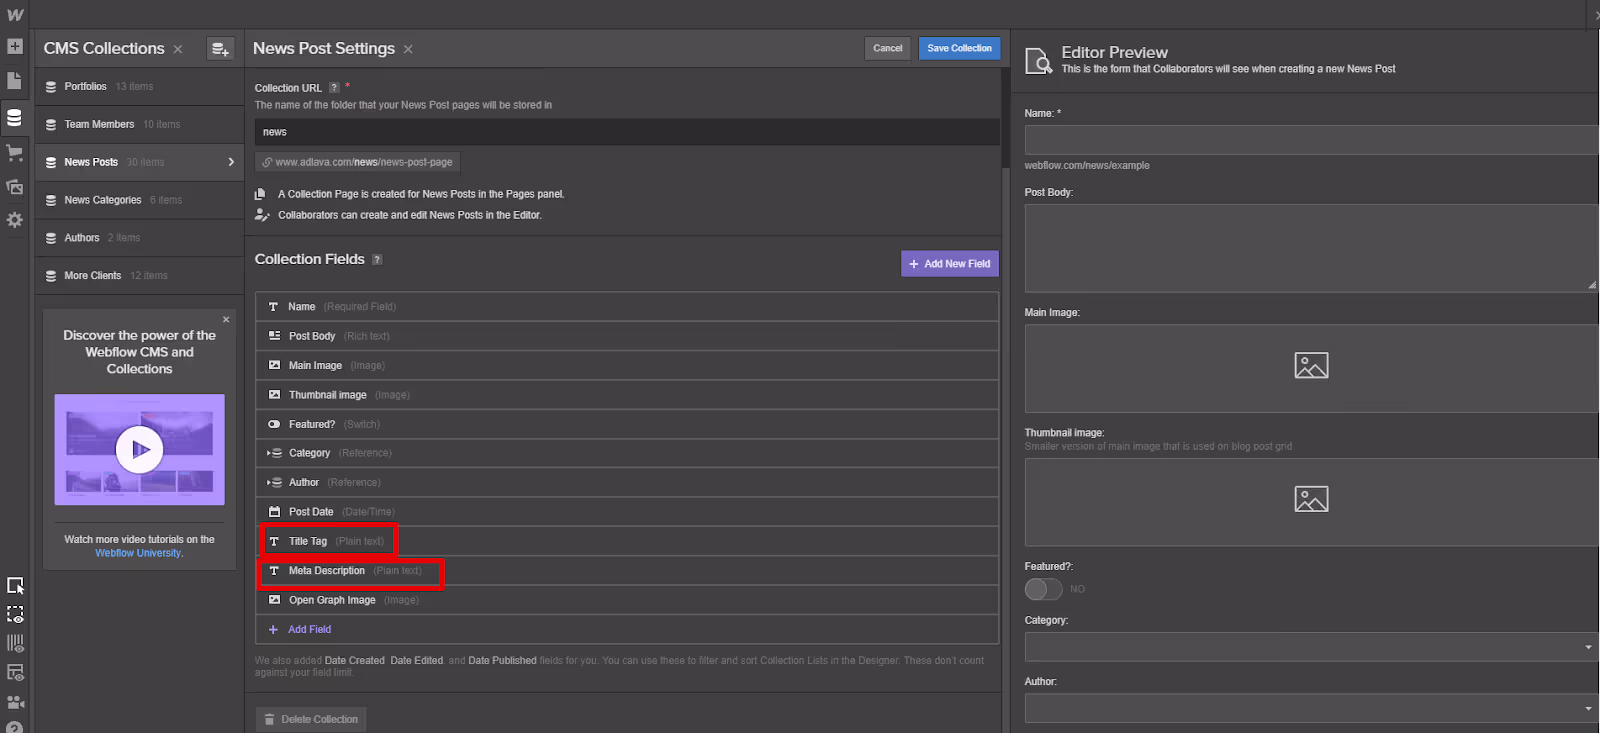
Titles and descriptions
When it comes to meta titles and descriptions, Webflow is similar to other big CMS. However, there's one important thing for designers to keep in mind: you must add the fields and link the corresponding options to the fields, otherwise they won't appear in the source code, even if they're filled out.

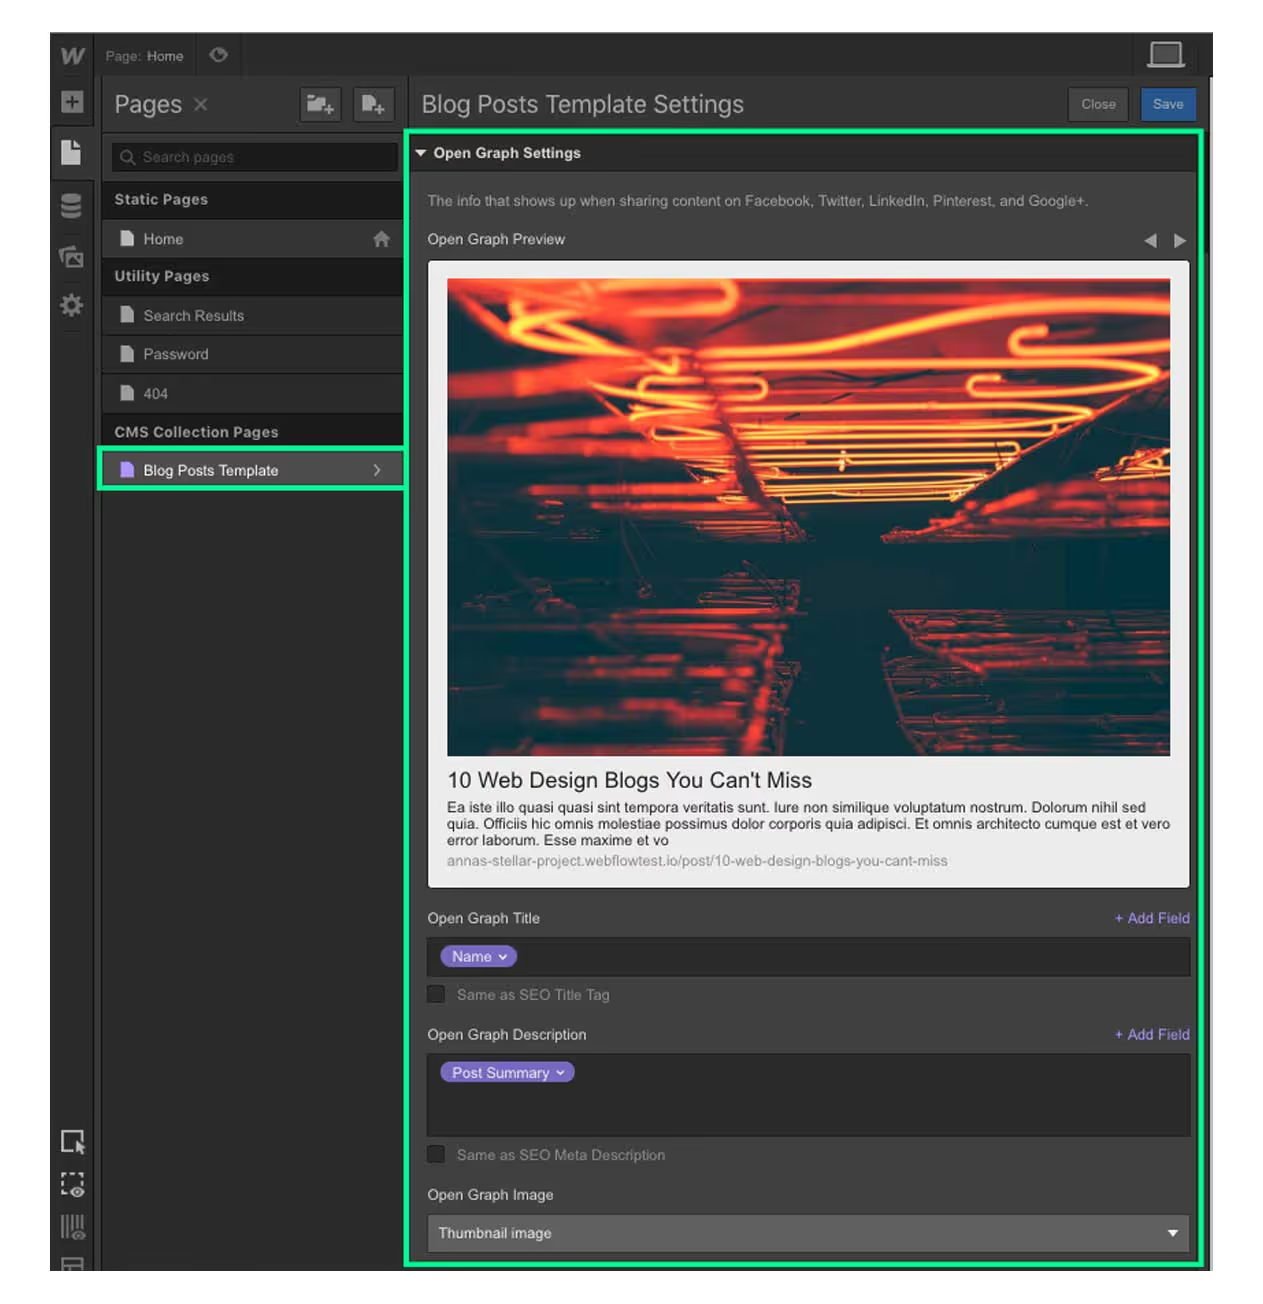
Open Graph settings
If you forget to set your Open Graph settings or let WordPress choose an image for you, make sure to be specific when it comes to images, titles, and descriptions in Webflow. (Or choose the settings that align with your SEO strategy)
This is especially crucial for blogs, where WordPress often uses the "Featured Image" if there's no Open Graph image specified. If you don't specify an image in Webflow, your website won't show a preview image when shared on social media.
301 / URL redirects
When you redesign a website, no matter which CMS you're using, there will be pages that will change or disappear. To avoid users from landing on broken pages and to minimize the loss of backlink equity, it's important to crawl your current website and set up 301 redirects properly.
This can be done easily in Webflow and while there's no option to upload a CSV, you can use rules to redirect groups of URLs that have similar formats.
Robots.txt and sitemaps
Webflow CMS has built-in support for handling Robots.txt and XML sitemaps. You can find helpful resources on both in Webflow University, but the most important thing to keep in mind is that you don't want search engines to crawl your subdomain or development website.
TIP: Use your robots.txt to block or allow crawlers as needed, and submit your XML sitemap to Google Search Console as usual.

Step 5: Improving performance and development
Improving performance and development on Webflow is essential for creating a smooth user experience and ensuring that your website runs efficiently. Here are some simple tips to enhance performance and development on Webflow:
- Optimize images: Large or unoptimized images can slow down the loading time of your website. Make sure to compress your images and use the appropriate file format (JPG, lottiefiles, etc.) for each image.
Flowbase has some great tools for this. - Minimize code: Keep your code clean and concise to reduce the amount of data that needs to be loaded on your website.
- Use the built-in performance tools: Webflow Designer has a built-in performance tool that analyzes your website's load time and suggests ways to improve it.
- Test your website: Test your website on different devices and browsers to ensure that it's working properly and that the user experience is consistent.
These are just some basic suggestions.
For additional guidance, visit our learning centre, which we try to update regularly.
Step 6: CMS training
Ultimately, provide instruction and training for the client on utilizing Webflow and making modifications to their website. This would entail educating them on how to change content, create new pages, and perform other adjustments without the assistance of a developer.
Make sure you allocate enough time for training, as it is essential that they get a full understanding.

Conclusion
Switching from WordPress to Webflow can definitely be a great decision. Not only does it improve website performance and design, but it also gives you more control over your website. You can now make changes quick and easily, without depending on a developer.
If you're running a Fintech website, we highly recommend considering switching from WordPress to Webflow as a platform for your website.


